Gemfile의 작성
Gemfile의 작성
레일스 프로젝트를 생성하면 프로젝트 루트 디렉토리에 Gemfile 파일이 자동으로 생성된다. Gemfile은 다양한 젬(gem)을 등록하는 파일로 텍스트 파일이다. 여기서 젬이란 다른 언어에서 흔히 접하게 되는 일종의 루비 라이브러리라고 간단하게 생각하면 된다. 이미 많은 젬들이 공개(http://rubygems.org)되어 있기 때문에, 우리는 그저 필요한 젬을 Gemfile에 등록해서 사용하면 된다.
참고 : 루비툴박스 웹사이트를 방문하면 다양한 젬을 카테고리별로 검색할 수 있다.
Bundler 설치하기
레일스에서는 젬의 의존성 관리를 위해 Bundler를 사용할 수 있다.
위에서 언급한 Gemfile이 Bundler에서 사용하는 젬 의존성 정의 파일이고, bundle은 Gemfile에 정의된 젬들의 의존성을 파악해서 올바른 젬을 사용할 수 있도록 하는 명령어다.
Bundler 설치는 다음의 명령어로 가능하다. rbenv을 사용하는 경우 Bundler 설치후 rbenv rehash를 잊어서는 안된다.
$ gem install bundler
이제부터 Gemfile 이 있는 곳에서 bundle install 명령어를 실행하면 Gemfile에 명시된 젬을 사용할 수 있게된다.
Warning : 새로운 루비 버전을 설치할 때마다
bundler젬을 설치해야 한다.
사용할 젬 소개
레일스 프로젝트를 생성하면 이미 다수의 젬들이 등록되어 있다. 이 젬들은 레일스 프로젝트가 실행되기 위한 최소한의 것들이다. 모든 젬은 버전을 가지고 있어서 이러한 버전이 때로는 호환성 문제로 매우 중요하게 다루어진다.
Info : 프로젝트 디렉토리를 유심히 보면
Gemfile.lock파일을 찾을 수 있다. 이 파일은bundle install로 설치된 젬들의 버전을 기억해 두는 파일 정도로 생각하면 된다. 따라서 이 파일은 소스관리(git)에 포함해 두는 것이 좋다. 이것은 다른 개발자가 동일한 소스로 개발할 때 동일한젬버전을 사용할 수 있게 해 주어 호환성의 문제를 해결할 수 있는 방법이 되기도 한다.
이제 여러가지 기능을 구현하기 위해 필요한 젬들을 Gemfile에 추가해 보자. 추가할 젬 목록은 아래와 같다.
gem 'bootstrap-sass', '~> 3.3.3'
gem 'simple_form', '3.1.0'
[참고사항]
bootstrap-sass: 반응형 모바일 웹브라우져 환경을 구축하기 위한 프론트엔드 프레임워크 중의 하나인Twitter-Bootstrap(줄여서Bootstrap이라고도 함)을 레일스 프로젝트에서 사용하기 쉽게 해 주는 젬이다.
simple_form:bootstrap과 함께 레일스의form_for헬퍼메소드을 사용할 때 잘 어울리는 젬이다.
젬 설치하기
젬을 Gemfile에 등록한 것만으로 바로 사용할 수 있는 것은 아니다. bundle install이라는 커맨드라인 명령을 수행하여 설치하는 과정이 필요하다. 아래와 같이 명령을 실행한다.
$ bin/bundle install
Fetching gem metadata from https://rubygems.org/..........
Resolving dependencies...
Using rake 10.4.2
Using i18n 0.7.0
Using json 1.8.2
Using minitest 5.5.1
Using thread_safe 0.3.4
Using tzinfo 1.2.2
Using activesupport 4.2.0
Using builder 3.2.2
Using erubis 2.7.0
Using mini_portile 0.6.2
Using nokogiri 1.6.6.2
Using rails-deprecated_sanitizer 1.0.3
Using rails-dom-testing 1.0.5
Using loofah 2.0.1
Using rails-html-sanitizer 1.0.1
Using actionview 4.2.0
Using rack 1.6.0
Using rack-test 0.6.3
Using actionpack 4.2.0
Using globalid 0.3.0
Using activejob 4.2.0
Using mime-types 2.4.3
Using mail 2.6.3
Using actionmailer 4.2.0
Using activemodel 4.2.0
Using arel 6.0.0
Using activerecord 4.2.0
Using execjs 2.2.2
>>>> Installing autoprefixer-rails 5.1.0
Using debug_inspector 0.0.2
Using binding_of_caller 0.7.2
Using sass 3.4.10
>>>> Installing bootstrap-sass 3.3.3
Using bundler 1.7.12
Using columnize 0.9.0
Using debugger-linecache 1.2.0
Using slop 3.6.0
Using byebug 3.5.1
Using coffee-script-source 1.9.0
Using coffee-script 2.3.0
Using thor 0.19.1
Using railties 4.2.0
Using coffee-rails 4.1.0
Using hike 1.2.3
Using multi_json 1.10.1
Using jbuilder 2.2.6
Using jquery-rails 4.0.3
Using tilt 1.4.1
Using sprockets 2.12.3
Using sprockets-rails 2.2.4
Using rails 4.2.0
Using rdoc 4.2.0
Using sass-rails 5.0.1
Using sdoc 0.4.1
>>>> Installing simple_form 3.1.0
Using spring 1.2.0
Using sqlite3 1.3.10
Using turbolinks 2.5.3
Using uglifier 2.7.0
Using web-console 2.0.0
Your bundle is complete!
Use `bundle show [gemname]` to see where a bundled gem is installed.
위의 출력내용 중에서 >>>>로 표시된 부분이 추가될 젬을 나타낸다. 설명을 위해서 편집한 상태이다.
Info
젬은 rubygems.org로부터 다운로드 받기 때문에 인터넷이 연결되지 않는경우 설치가 불가능하다. 이미 컴퓨터에 해당젬버전이 설치되어 있으면 해당 버전을 사용하기때문에 좀더 빠르게 설치된다. 개인적으로젬저장소를 운영하거나git저장소로부터젬을 설치 할 수있으므로 닫힌 네트워크 환경이라고 걱정할 필요없다.
Bootstrap을 실제로 프로젝트에 적용하기 위해서 약간의 설정 과정이 필요하다.
우선, 모든 scss 파일에서 Bootstrap의 모든 스타일, 믹신, 변수들을 사용하기 위해서 아래와 같이 추가한다.
INFO :
SASS에 대한 것은 ‘SASS 간단정리‘를 참고하면 도움이 된다.
Bootstrap Asset 설정
app/assets/stylesheets/ 디렉토리 상의 application.css를 삭제하고 대신에 application.scss 파일을 생성하고 아래와 같이 추가한다.
$light-orange: #ff8c00;
$navbar-default-color: $light-orange;
$navbar-default-bg: #312312;
$navbar-default-link-color: gray;
$navbar-default-link-active-color: $light-orange;
$navbar-default-link-hover-color: white;
$navbar-default-link-hover-bg: black;

@import 'bootstrap';

body { padding-top: 60px; }
Bootstrap의 모든 자바스크립트 헬퍼를 사용하기 위해서는 app/assets/javascripts/application.js 파일을 아래와 같이 수정한다.
//= require jquery
//= require jquery_ujs
//= require bootstrap   <<< 추가한 부분
//= require turbolinks
//= require_tree .
Simple_form 설치
Bootstrap과 Simple_form을 연결하기 위해 아래와 같이 Simple_form을 --bootstrap 옵션과 함께 설치한다.
$ bin/rails generate simple_form:install --bootstrap
[Simple Form] Simple Form is not configured in the application and will use the default values. Use `rails generate simple_form:install` to generate the Simple Form configuration.
      create  config/initializers/simple_form.rb
      create  config/initializers/simple_form_bootstrap.rb
       exist  config/locales
      create  config/locales/simple_form.en.yml
      create  lib/templates/erb/scaffold/_form.html.erb
===============================================================================

  Be sure to have a copy of the Bootstrap stylesheet available on your
  application, you can get it on http://getbootstrap.com/.

  Inside your views, use the 'simple_form_for' with one of the Bootstrap form
  classes, '.form-horizontal' or '.form-inline', as the following:

    = simple_form_for(@user, html: { class: 'form-horizontal' }) do |form|

===============================================================================
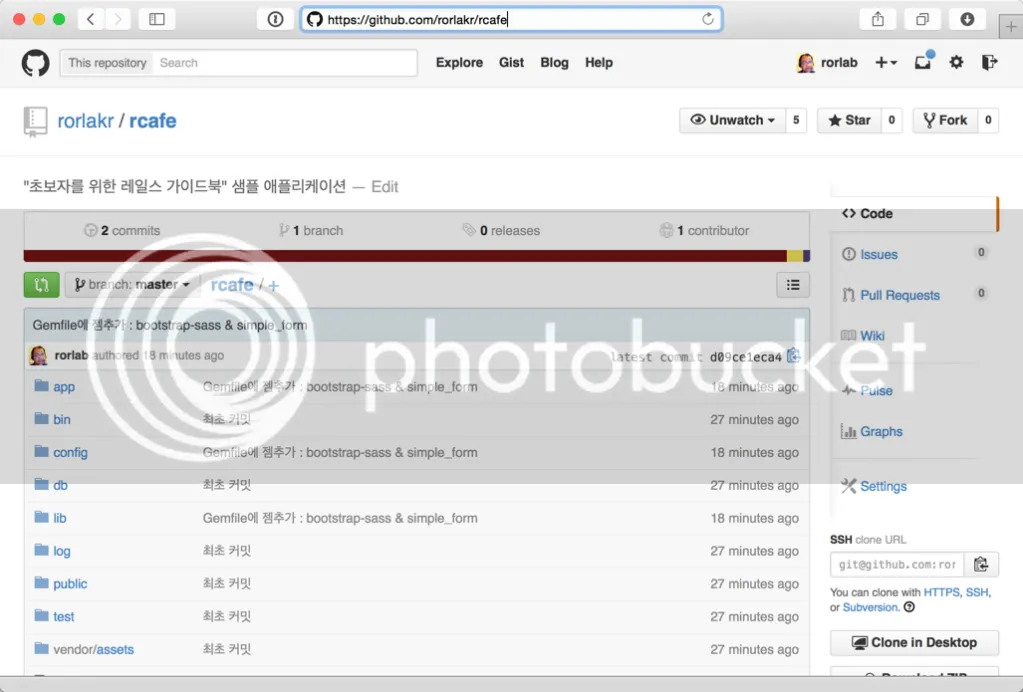
Git 커밋후 Github에 푸시하기
지금까지 작업한 내용을 커밋한다. (Git에 대해서 더 자세한 내용은 Git 설치를 참고하기 바란다.)
$ git add .
$ git commit -m "Gemfile에 젬추가 : bootstrap-sass & simple_form"
Github에서 rcafe라는 저장소를 만들고 URL 주소를 로컬저장소의 원격 저장소 origin으로 등록한 후, 커밋내용을 Github로 푸시한다.
이에 대한 자세한 내용은 아래를 참고하자.
Git소스 https://github.com/rorlakr/rcafe/tree/chapter_05_01